一开始按照DO教程在云主机上部署了hexo框架,已经把静态网页hexo-generate发布到github上了,该教程能够实现

  1. 云主机写文章
  2. 一键发布静态网页到github
  3. 配置nginx服务器
  4. 自动从github上拉取静态网页并同步到服务器根目录

后来发现这不是自己的本意。服务器毕竟编写markdown太不方便,我需要的流程:

  1. 本地写好文章
  2. 一键发布静态网页到github
  3. 主机配置nginx服务器
  4. 服务器根目录自动同步github上的静态网页

也就是说我的步骤只是把教程中hexo配置部分移到本地主机即可。


Windows配置hexo环境

安装git,进入git-bash并配置git

1
2
3
4
5
6
git config --global user.name "Your Name"
git config --global user.email "youremail@domain.com"
git config --list
git config --global --list 查看当前用户(global)配置
git config --system --list 查看系统config
git config --local --list 查看当前仓库配置信息

安装node.js,包括npm
安装hexo,hexo-server提供本地预览服务

1
2
npm install hexo-cli -g
npm install hexo-server -g

在合适目录下新建博客目录并安装所需库

1
2
3
hexo init blog-name
cd blog-name
npm install

编辑站点配置文件(配置文件详解):vi hexo-blog/_config.yml
配置文件中,冒号后面一定要加空格

1
2
3
4
5
6
7
8
9
10
11
12
13
14
15
16
17
18
19
20
21
22
23
24
25
26
27
28
29
30
31
32
33
34
35
36
37
38
39
40
41
42
43
44
45
46
47
48
49
50
51
52
53
54
55
56
57
58
59
60
Hexo站点配置文件
# Site 站点配置
title: Hexo Blog #网站标题
subtitle: My blog for technical life #网站副标题
description: I don't know how to describe #网站描述
author: GuoXiaoyang #网站作者
language: zh-Hans #网站使用的语言
timezone: Asia/Shanghai #网站时区
# URL
## If your site is put in a subdirectory, set url as 'http://yoursite.com/child' and root as '/child/'
url: http://your_ip_address #网址
root: / #网站根目录
permalink: :year/:month/:day/:title/ #永久链接格式
permalink_defaults: #永久链接中各部分的默认值
# Directory
source_dir: source #资源文件夹,用来存放内容
public_dir: public #公共文件夹,用于存放生成的站点文件
tag_dir: tags #标签文件夹
archive_dir: archives #归档文件夹
category_dir: categories #分类文件夹
code_dir: downloads/code #Include code 文件夹
i18n_dir: :lang #国际化文件夹
skip_render: #跳过指定文件的渲染
# Writing
new_post_name: :title.md # File name of new posts
default_layout: draft #默认布局
titlecase: false # Transform title into titlecase
external_link: true # Open external links in new tab
filename_case: 0 #把文件名称转换为 (1) 小写或 (2) 大写
render_drafts: false #显示草稿
post_asset_folder: false #是否启动资源文件夹
relative_link: false #把链接改为与根目录的相对位址
future: true
highlight: #代码块的设置
enable: true
line_number: true
auto_detect: false
tab_replace:
# Category & Tag
default_category: uncategorized #默认分类
category_map: #分类别名
tag_map: #标签别名
# Date / Time format
## Hexo uses Moment.js to parse and display date
## You can customize the date format as defined in
## http://momentjs.com/docs/#/displaying/format/
date_format: YYYY-MM-DD
time_format: HH:mm:ss
# Pagination 分页
## Set per_page to 0 to disable pagination
per_page: 10 #每页显示的文章量 (0 = 关闭分页功能)
pagination_dir: page #分页目录
# Extensions 扩展
## Plugins: https://hexo.io/plugins/ 插件
## Themes: https://hexo.io/themes/ 主题
theme: landscape #当前主题名称
# Deployment #部署到github
## Docs: https://hexo.io/docs/deployment.html
deploy:
type:

创建并编辑文章
hexo new first-postsource/draft中生成first-post.md,vi first-post.md编辑模板:

1
2
3
4
5
6
7
8
9
10
11
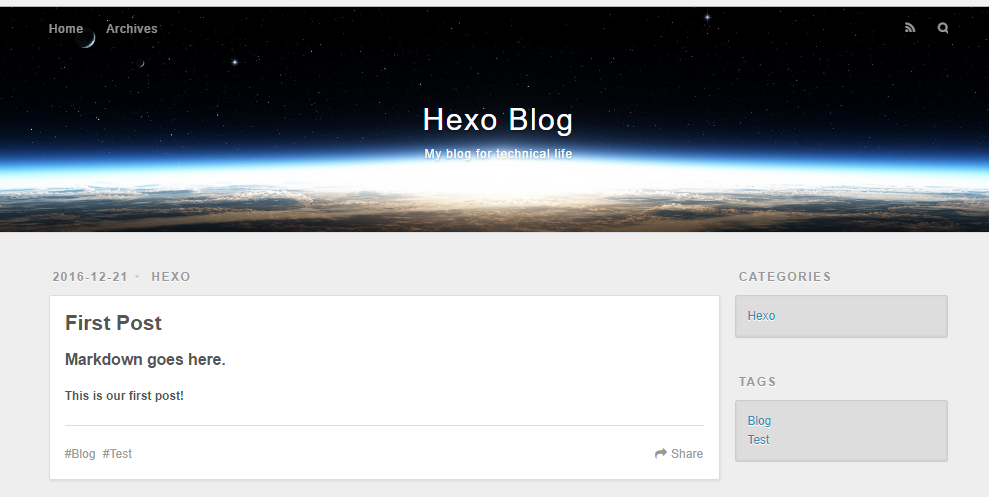
title: First Post
tags:
- Test
- Blog
categories:
- Hexo
comments: true
date: 2015-12-31 00:00:00
----
## Markdown goes here.
**This is our first post!**

发布文章

1
hexo publish first-post

测试页面
hexo server开启hexo服务端,输入http://localhost:4000/可见页面如下:
image_1b4h0cot016mu1gvca3hv3l10r59.png-235.8kB


配置git一键发布静态网页提交到github

github创建仓库hexo_static,在博客目录下安装npm install hexo-deployer-git --save,并修改hexo配置。首先需要清除在服务器上的提交,删除博客:在_post目录下删除博客后hexo clean,再提交。

1
2
3
4
5
6
#Deployment
##Docs: https://hexo.io/docs/deployment.html
deploy:
type: git
repo: https://github.com/guoxiaoyang/hexo_static.git
branch: master

命令:hexo generate && hexo deploy,提交到github仓库中,提交时出错:

1
2
bash: /dev/tty: No such device or address
error: failed to execute prompt script (exit code 1)

需要配置github ssh密钥连接ssh-keygen -t rsa -b 4096 -C your_email
C:\Users\user_name\.ssh目录下生成,将内容粘贴到github上公钥中,再ssh -T git@github.com

You've successfully authenticated, but GitHub does not provide shell access.

并将repo修改:
repo: git@github.com:GuoXiaoyang/hexo_static.git
再提交即可成功


服务器端脚本自动同步静态网页

服务器端安装nginx,浏览器输入ip见到Welcome to nginx即安装成功

1
2
3
4
sudo apt-get install nginx
sudo service nginx start #开启服务
sudo service nginx stop #关闭服务
sudo service nginx restart #重启服务

要使服务器在重启后能自动重启nginx服务:

1
sudo update-rc.d nginx defaults

nginx配置,新建目录/var/www/hexo

1
2
3
sudo chown -R $USER:$USER /var/www/hexo #添加文件所有者 
sudo chmod -R 777 /var/www/hexo #添加权限
sudo nano /etc/nginx/sites-available/default #编辑配置文件
1
2
3
4
5
server {
listen 80 default_server;
listen [::]:80 default_server ipv6only=on;
root /var/www/hexo; #此处改变服务器指向目录
index index.html index.htm;

本地提交服务器端自动部署到根目录,需要部署github的webhooks,为了贴近自己想学习node.js的念头,所以没有用php脚本,参考前辈代码,自己的脚本deploy.sh与配置config.js如下:

1
2
3
4
5
6
7
8
9
#!/usr/bin/env bash
# Example of a deployment script
# You should probably replace this with your very own!
cd /home/gxy/hexo_static
git pull
echo "pull success"
rm -rf /var/www/hexo/*
cp -r * /var/www/hexo/
exit 0
1
2
3
4
5
6
7
module.exports = {
COMMAND : process.env.COMMAND || './deploy.sh',
SECRET : process.env.SECRET || 'your secret code', #配置你的web-hooks密钥
HOOK_PATH: process.env.HOOK_PATH || '/',
PORT : process.env.PORT || 1337, #配置你的端口
BRANCH : 'refs/heads/'+(process.env.BRANCH ||'master')
};

github端webhooks配置
image_1b4ja3rou11491imclkb1bvj91pp.png-81.5kB
开启node.js服务

1
2
npm start
npm stop/npm restart #停止/重启

由于手机连接服务器端,最好用tmux开启多终端查看任务情况,否则一个终端无法关闭node进程去查看同步状况;另外遇到坑如下:退出ssh后重进无法开启npm任务,是因为node在后台进程中,关闭该进程再开启node服务即可;若希望进程关闭后能自动重启,可以用forever让nodejs应用后台执行


Hexo配置next主题及第三方应用

参考官方教程
显示网站的缩略标志,将favicon.ico放进Hexo/source

1
2
#主题配置文件
favicon: /favicon.ico